1.31.2013

{PICTURE SHARE}

Like I've said before, my goal this year is to capture more "moments" rather than events, and to do so using my Nikon, NOT my iPhone! :) I think it's going pretty well so far. Granted it HAS only been a month...but a successful one, nonetheless.

A neighbor brought over some frozen cookie dough (along with about FIVE blankets she'd made for the new baby) and my kids could hardly wait to cut it up and get those cookies in the oven. (I think maybe it's been too long since I made cookies...) Anyway, Gavin wanted to watch them bake and promptly went to get his little stool from the bathroom. He then, of course, wanted Abbie to join in his excitement and she was so cute to humor him. I love how much she loves him. She loves giving kisses and hugs and it was no surprise that she snuck her arm around him as they watched the cookies bake. Oh to be little again and take time to enjoy the little moments...like watching cookies in the oven.


1.30.2013

{DIGITAL PROJECT LIFE - TIPS AND TRICKS}


Digital Project Life. What are my thoughts? Well I think it's fabulous!! That being said, I'm a digi-girl through and through. For me, it's the ONLY way to go. So I'm here to share with you some of my thoughts and pointers for your Digital Project Life.

First off, you need to have access to some sort of Photoshop Program. I recommend Adobe Photoshop Elements. Once you've got that, or something similar, you're ready to get started.

DISCLAIMER: This is not meant to be a beginner Digital Scrapbooking Tutorial, if you need help learning your program, go HERE.

The first thing you need is a template. This seriously takes the majority of the hassle out of it for me. Especially if you're going to be keeping the same overall layout through your whole album, a template will be a HUGE time saver. And it's your lucky day, I've got one for you! (Click HERE to learn how to use a template in Photoshop or Photoshop Elements)


::CLICK IMAGE TO DOWNLOAD::

This is the basic template that I use. So that's step one, choose your layout.

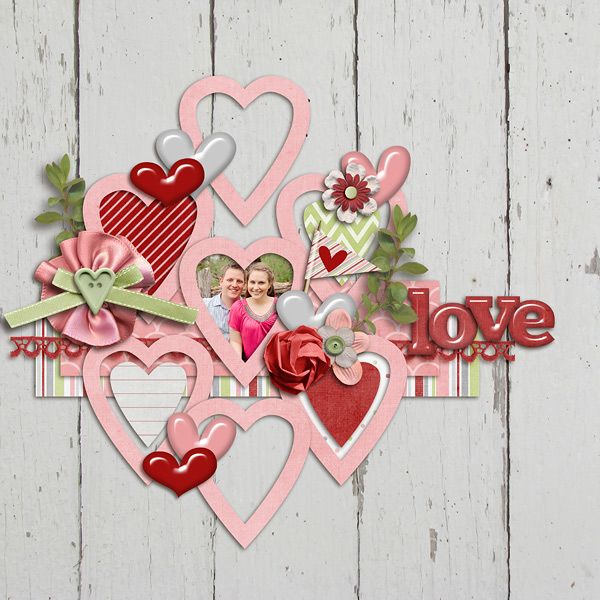
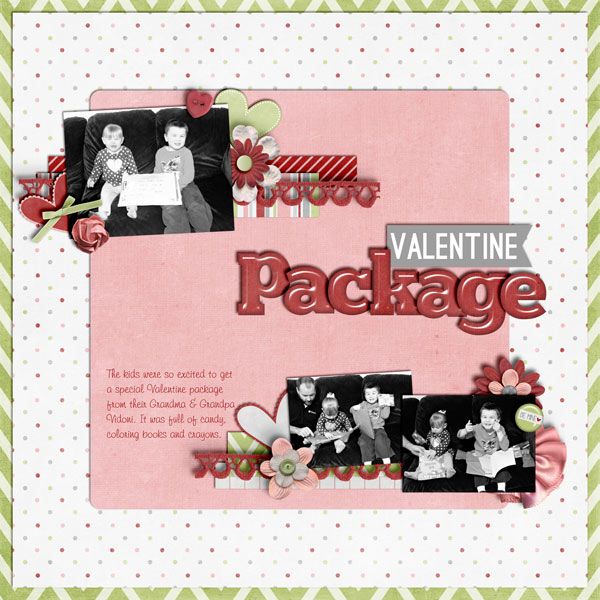
Next, you need to decide what theme you'd like your album to have. Do you want to stick with the same colors throughout? Would you like your holiday weeks to be different? Are you going to switch it up according to the season? Do you like the clean line/graphic look? Or do you want it to be more "bulky" with lots of elements? Personally I decided to stick with the same graphic theme throughout, just switching it up for each holiday week. So the week of Valentines Day my pages will be mostly pink and red with lots of hearts. ;) Then the next week I'll go back to my regular green, blue, gray, and pink.


When I was trying to decide what look to go for, I SCOURED Pinterest and pinned anything that caught my eye. That was the best way for me to recognize the theme I wanted to go with. It was easy for me to identify my style, because most of my pins ended up having the same feel.


Just to give you an idea what the difference is, here is one of my pages:


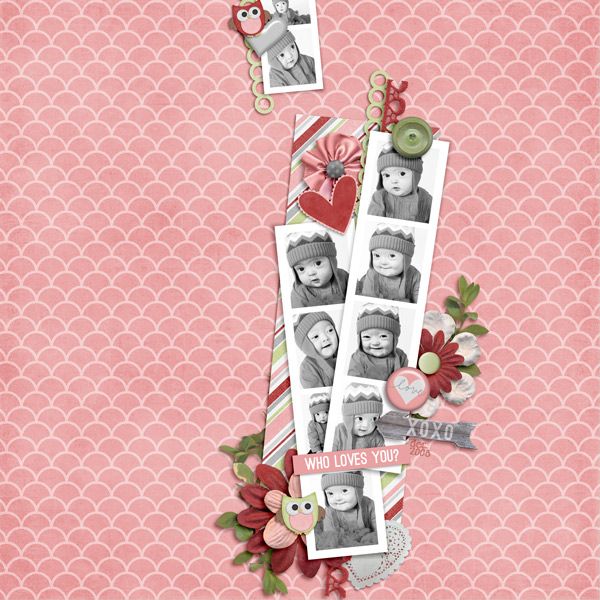
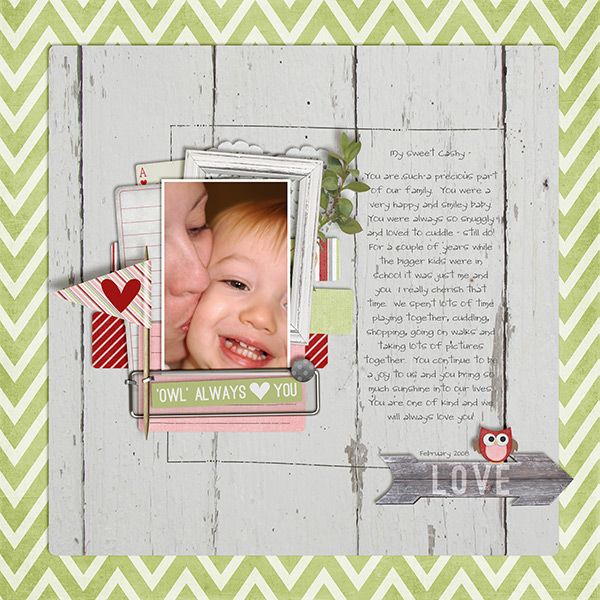
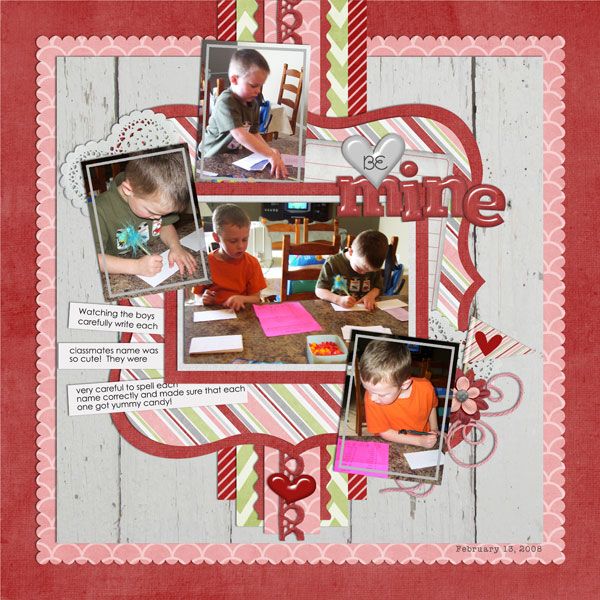
And here is a page I found on Pinterest that's a little more "cutesy-scrappy":


Now that you've decided what theme/feel you'd like to go with, you can start collecting! The fun part, right? There are all sorts of fun elements to spruce up your pages, from cutesy ribbons, buttons, & flowers, to graphic brushes and custom shapes, etc. 

Here's a list of what "I" think the basics are:

1. Template(s)
2. Digital Papers
3. Journaling Cards
4. Calendar Cards
5. Elements/Graphics
6. Filler Cards/WordArt
7. Fonts

I've got lots of fun papers, templates, and word art options in my shop, click HERE to go look around.

As far as fonts are concerned, in my opinion they can either make or break the entire page, so choose wisely. :) Here are some of my favorite Project Life fonts:


Now you're ready to start scrapping! Inserting pictures and papers into the template is SO fun and SO easy. And the best part about creating digitally is that you can go back and re-arrange things. There have been a couple of my pages that I thought were complete, but when I went back and looked at it the next week, I realized there was something I wanted to change. That's the beauty of digital, my friends. I {heart} Project Life. I already love going back and looking at my pages!

So just a little recap:

1. Choose your layout
2. Choose your "theme"
3. Collect your supplies
4. SCRAP!


Have you gone to a concert or sporting event? Take a picture of your ticket! With Digital Project Life we don't have the option to insert the real thing, but you can make it look real! You can even take it to the next level and staple or paper-clip it onto the picture of you at the event! 

I'll try to post more tips and tricks as the year goes on and I become a more "experienced" Project Lifer, but for now, I hope this at least helps some of you get started.

1.29.2013

{VALENTINE'S DAY CHAIR WREATHS}

I know, it's not even February yet, but I've been breaking out all of my Valentine's Day decor to take my mind off of this:


YUCK! I can barely see past my fence, and it's been like this almost the entire week. I'm going stir crazy! So, you can see the need to brighten things up a bit inside. :)


A few years ago I made some of those cute Valentine's Day envelope pouches for the back of your chairs, you know, the ones to leave each other cute Valentine notes etc.? Well, the year after I made them we got a new dining set and the cute little envelopes didn't work on my new chairs. :( So after 2 years, I decided to make something new!


Want to make your own? It's super easy, I promise!


I purchased my wreaths and glitter hearts from The Dollar Tree and all of my ribbon was purchased from Walmart. Yep, it's an inexpensive craft my friends...the best kind. I already had my chipboard hearts, so they were no added cost, but I'm sure you could find either chipboard or regular wooden ones at Hobby Lobby or Michaels. I used scrapbooking paper from my new "WHO LOVES YOU" kit. Just remember, if you print your own paper, DO NOT Mod Podge over the top of it, your ink will bleed.

First off, decide where you want the hole for your hearts to hang from. If you're using wood, go ahead and break out the drill, if you're using chipboard, a hole punch should do the trick just fine.

Okay, so now you trace your heart shape onto your scrapbook paper and cut them out. Then you're going to apply a VERY THIN layer of Mod Podge to your chipboard.


No gobs, just barely there. If you get too much it will get your scrapbook paper too wet and ruin it. Remember, less is more. PLUS, it will stick just fine and won't take forever to dry. :)

Once it's dry (maybe only five minutes or so) take your sandpaper and sand of the excess around the edges. The only pointer I have is to sand in a downward motion. Not back and forth, but like your trying to bend the paper off of the edge. Does that make sense? It will go A LOT quicker that way and it will leave a cute white edge around the heart. Here's the difference between sanded and not.


Now it's time to embellish! I kept mine fairly simple because I'm a simple kinda gal, but feel free to get as creative as you want.


Now you're ready to assemble! Simply tie your wreath onto your chair using your ribbon of choice. Then loop a smaller ribbon through the hole of your heart and tie it up around the larger bow. 


And there you have it! Best part? They only cost me about $3 each! Happy crafting, and Happy {early} Valentine's Day!

1.28.2013

{PROJECT LIFE - WEEK 4}

I've had a couple of you ask me to share my thoughts on doing Project Life digitally, so I just wanted to let you know that I'm working on compiling some tips and tricks for you, so stay tuned! :)

Here's my Week Four. I decided to omit the green this week since it was such a COLD DREARY YUCKY WINTERY week. Green just didn't really seem to "fit". :) I really like how the pages turned out without it. And for those of you who may be wondering, I create all of my PL products from scratch, so there are no credits to be given. If you are ever interested in obtaining a certain element, just let me know!


1.25.2013

{RECOLORING B&W GRAPHICS}

Want to take those black and white icons and graphics to a whole new level? It's a lot easier than you think. In just a few easy steps, you'll be recoloring to your hearts content. So let's get started!


1. Open up the image you'd like to recolor in your Photoshop program.
2. Set the background color to white, and the foreground color to any color you'd like.


3. Go to >Image >Adjust > Gradient Map, click ok.

That's it! This can also be done with 2 colors, not just a color and white. Play around, get creative!

And as a little bonus (and for something to practice with), I've made up this set of Project Life Calendar Cards for you!


::CLICK IMAGE TO DOWNLOAD::

Thanks for stopping by, and don't forget to comment if you download! ;)

1.24.2013

{WHO LOVES YOU?}

I'm sure all of my digital followers have been wondering where on EARTH the new products have been...well, I'm back...for a minute!

Let's be real for a minute, k? Ever since I got pregnant (in July) my creativity has totally and completely FLOWN at the window, and I think it decided to migrate south with the birds this winter!! I've had little spurts here and there, but overall, I have NOT been feelin' it. So, this may just be the last new kit you see before this new little bundle of joy arrives in March...who knows! Either way, I had tons of fun creating this Valentine's Day themed kit, and I hope you enjoy it as well.


And here is a little inspiration from my awesome team! Thanks guys for sticking around and not abandoning me!

LAYOUT BY: NATALIE


LAYOUT BY: EMILY


LAYOUT BY: LEEANDRA


LAYOUT BY: JENI


LAYOUT BY: HEATHER

LAYOUT BY: SHANTELL


LAYOUT BY: JAMIE


Remember, you save 20% through Monday!

1.22.2013

{VALENTINE CHALKBOARD PRINTABLE}

I decided it was time to break out the Valentine's Day decor...and I'll be honest...it was DEFINITELY lacking! I've been wanting to try my hand at creating a chalkboard print and figured this was the perfect time to give it a shot. I loved how it turned out, and when paired with my fun $3 Family Dollar glitter frame, we had a keeper!


And why not share, right? I've included sizes 8x10, 5x7, and 4x6 all in one convenient download, just for you. :)


:: CLICK IMAGE TO DOWNLOAD ::


1.21.2013

{PROJECT LIFE - WEEK 3}

Week three is complete! I've tried to focus this week on getting out my Nikon and taking nice, quality pictures, not just snapping away with my iPhone. I've also tried being a little more creative with my photos, more than anything just to help me stretch myself and grow as a photographer. I've can't even TELL you how pleased I've been with the results. Also, I'm happy to report that I'm feeling like a new person. Still not 100% yet, but way better than Wednesday...when I really thought maybe I was on the brink of death. (okay, not really, but it was bad...) ;)


1.18.2013

{PROJECT LIFE FREEBIE}

Just popping in with a little Friday Freebie for you all. Technically they're meant to be used as Project Life filler cards, but they could be used for any of your scrapping needs. :) ENJOY!


:: CLICK IMAGE TO DOWNLOAD ::

1.17.2013

{ANOTHER SICK DAY}

I think yesterday was the worst of this nasty cold (I hate being sick and pregnant at the same time). Gavin and I are both feeling MUCH better today. And even though I'm sure I could have cleaned bathrooms and mopped floors, I decided to just take it easy and have another lay around jammie kind of day.

I've been wanting to start a blanket for this little baby boy coming in March. I decided today was the perfect day for that. And what do you know? I actually had all of the colors of yarn I needed! Perfect, no need to run to the store. :) I'm really excited about getting the nursery put together, it looks pretty cute in my mind...hopefully it all comes together the way I've envisioned. Anyway, here's a little sampling of what the blanket is going to look like.


Aren't the colors pretty? It was kind of an afterthought to add the blue, but it really brings the color scheme to life.

I also whipped up this cute little elephant print to hang on the wall as part of a photo collage that will go above the changing table.


And this is what Mr. Gavin did while I crocheted in my bed:


Super Hero setups. I love it. I especially love how he has to put them in order. The Hulk's have to go together, the Zurg's have to go together...etc. This was just before they all got "HULK SMASHED"! Now the big kids are home and I suppose life turns to homework and reading. Still hard to believe sometimes that I have a 1st AND a 3rd grader...I so don't feel old enough!


1.14.2013

{PROJECT LIFE 2013}

I attempted Project Life last year. I haven't given up yet, but when I got pregnant, well, it kind of went by the wayside. First things first right? :) I think I'm somewhere around week 30. I've got all of the pictures (BELIEVE me I've got pictures!), it's just a matter of getting them into my "album". I say "album" because I'm a digital Project Lifer. None of that messy taping, glueing, sewing, and paper scraps for this gal! So even though last year is not yet complete, I decided not to let that stop me from starting this year!

A lot of my ideas have been taken from Susan Weinroth, I absolutely ADORE her style! However of course I've added my own personal touch. I'm really pleased with how it's coming together so far. I love the color pallet I've chosen. Blues and greens with a little touch of pink, for Miss Abbie and me! :)

COVER PAGE:


WEEK ONE:


WEEK TWO:


And there you have it! Weeks one and two. Last year almost the entire year was captured on my iPhone. This year it's my goal to take my Nikon with me everywhere I go so I can capture the memories in high quality, plus I know it will help me improve my photography skills as well. Not that there won't be an occasional iPhone photo, but you get the idea! :)


1.11.2013

{Consolidating}

Hello, and welcome to my little corner. I'll be honest, I've tried blogging before...in all different forms. I've had a personal blog (which kind of bit the dust when baby #3 arrived...3 years ago!), I have my scrapbooking blog (which gets updated ONLY when I have a new product release), and I've had a photography blog (which got updated hardly EVER). I love the idea of a blog, a place to record all of the happenings in my life, but I never felt like I could keep up on all three. So, what's the answer you may ask? Well, MY answer was...HELLO??? Combine them! So, here you will find a little bit of everything. My creative adventures, new digital product releases, free downloads, a glimpse into the life of my little family, and perhaps a little photography along the way. I hope you love what you see, thanks for stopping by!